Ashby
Last updated: October 1, 2025
Simple, easy to follow instructions to integrate Ashby.
💁 Need help? Contact your Customer Success Manager at any stage — we’ll ensure your integration runs smoothly.
❗ Note: Ashby does not support synchronisation of interview times from hackajob to the ATS.
ℹ For this integration, both the candidate’s CV and their hackajob profile will be uploaded into the ATS.
1. Check prerequisites
Before getting started, make sure you have the right permissions.
Master Account permissions in hackajob
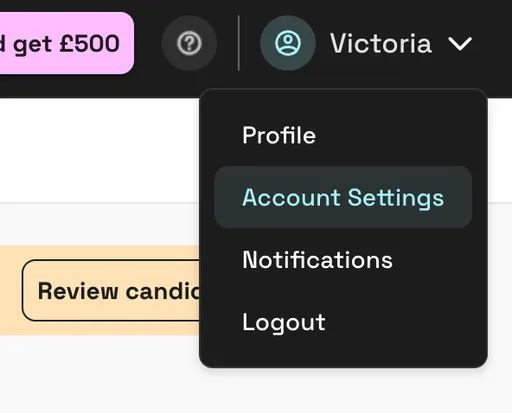
Log in to hackajob and go to Account settings
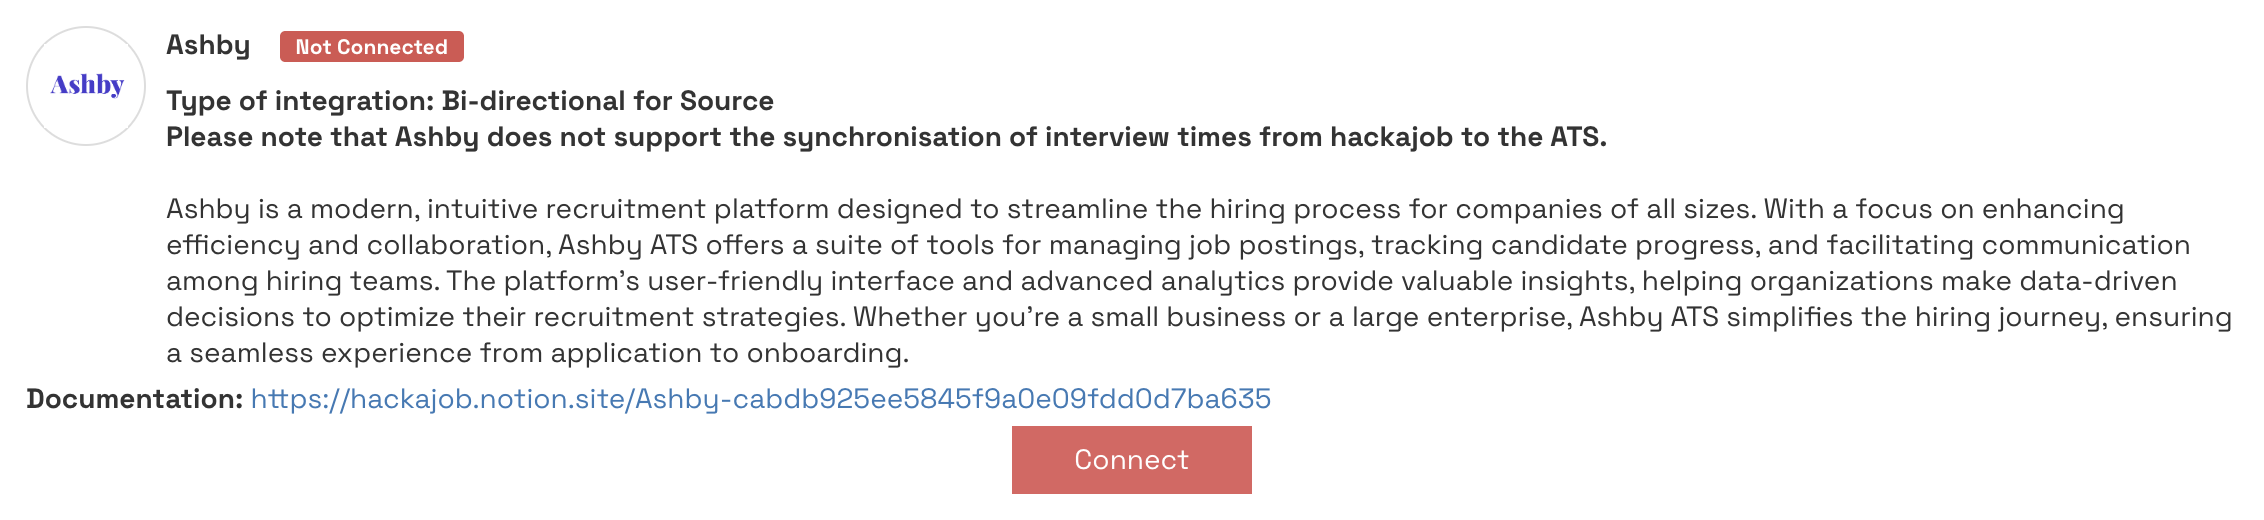
Under ATS integrations, check for Connect buttons under each ATS option.
If you see the buttons → you’re good to go.
If you don’t → contact your hackajob Customer Success Manager.
Ashby user permissions
You need to be an Organizational Admin in Ashby. You know you are one if you can select the Admin tab on the top.
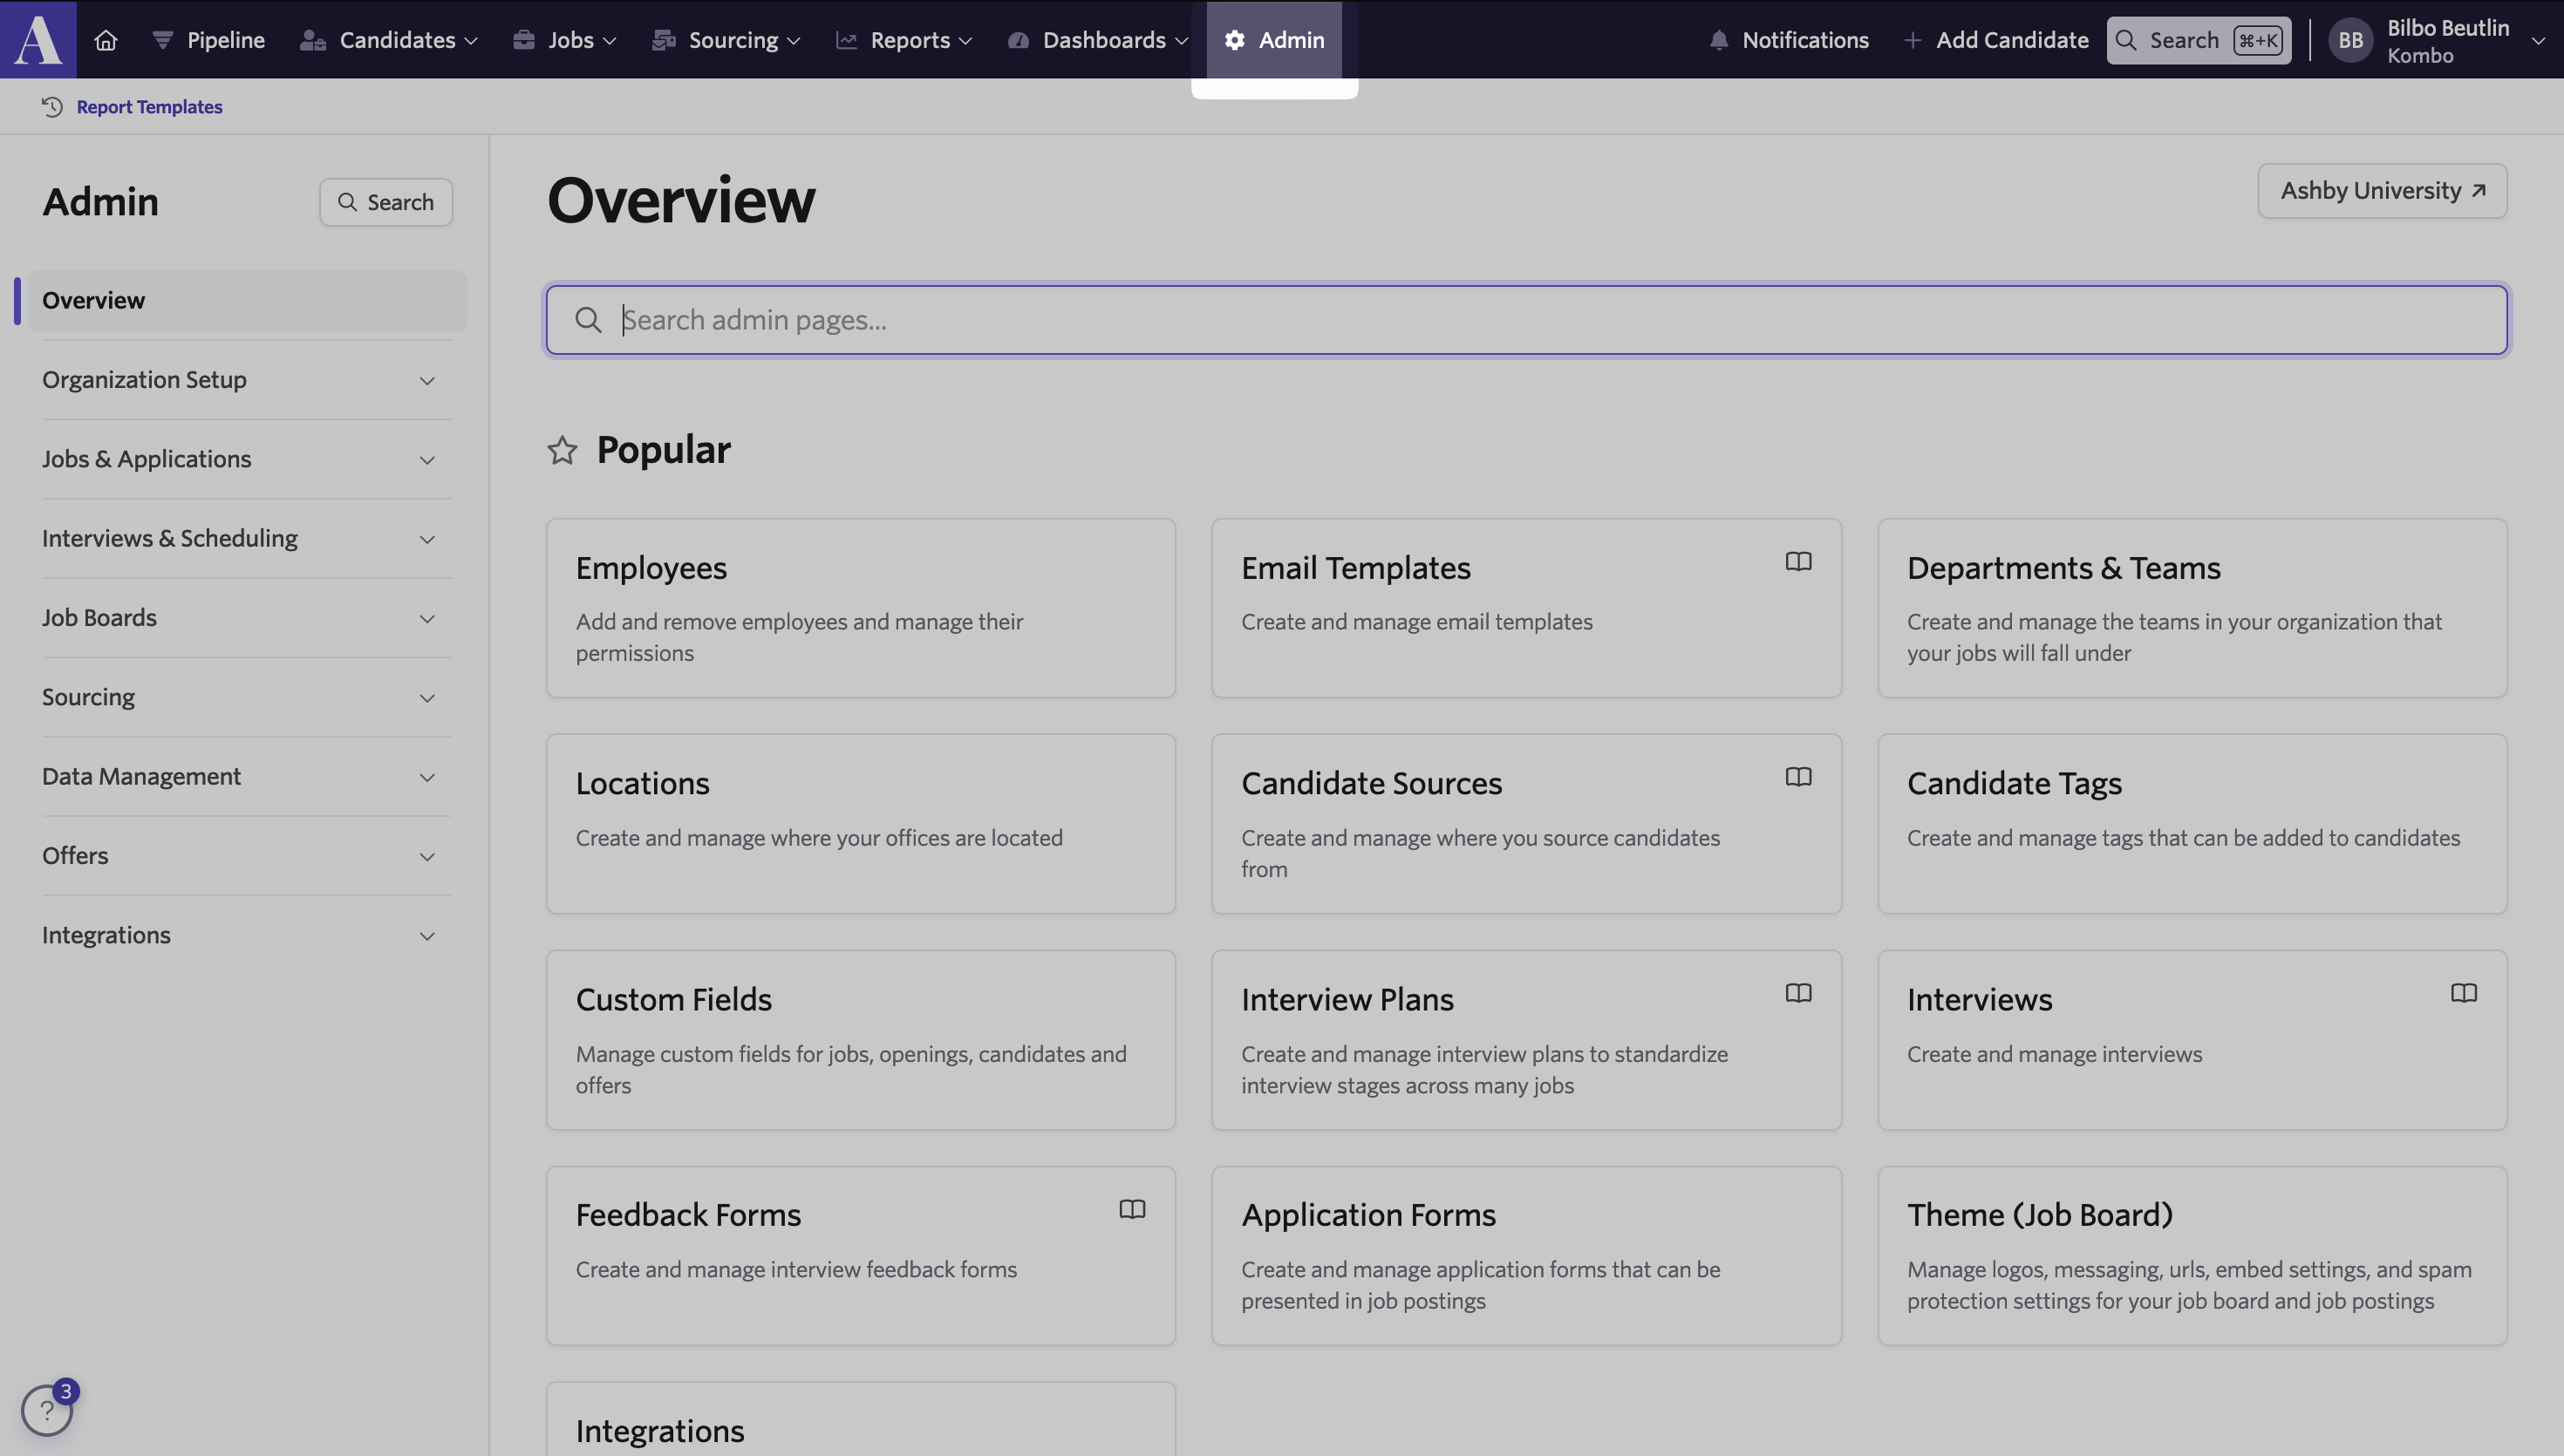
If you are not Admin, please reach out to your Administrator or IT department.
Ashby does not tell you who an admin is.
2. Connect your Ashby account
In hackajob, go to Account settings → ATS integrations.
Click Connect under Ashby.
Follow the connection flow to authorize access.
This is what you will see once you click “Connect” on hackajob
This details pre-requisites and will walk you through each step
🏠 Candidate Source setup guide
For simple, accurate attribution and tracking
👀 How a candidate Source is displayed
Where to see sources on a profile in Ashby
3. Map your jobs
Mapping ensures candidates flow into the right role and stage in Ashby, and that stage updates stay in sync.
👉 No mapping = no automation.
Every time you open a new role, make sure it’s mapped.
Steps to map
Go to Source
Next to a live role, open the ⋮ menu and select Add ATS configuration.
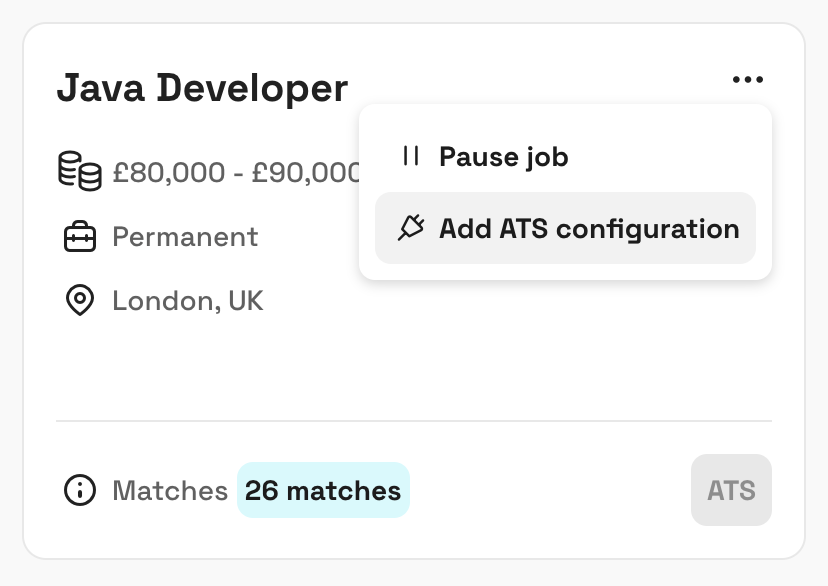
For your first mapping, choose New configuration. For future roles, select Import existing configuration.
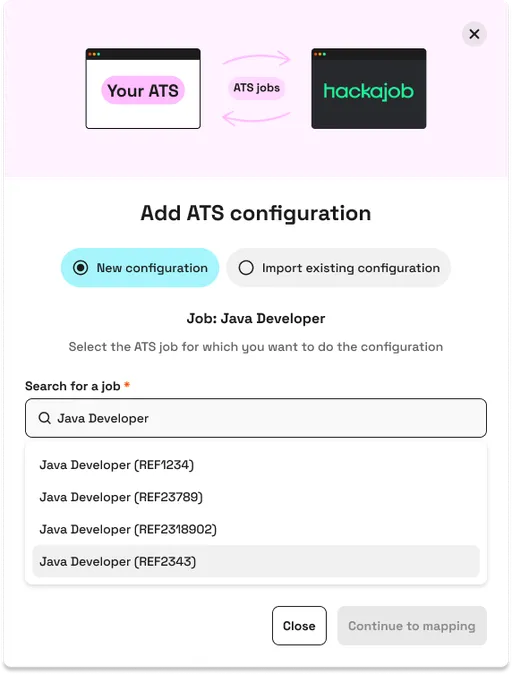
Select the matching ATS job and click Continue to mapping.
Map each hackajob stage to an ATS stage (leave blank if none applies).
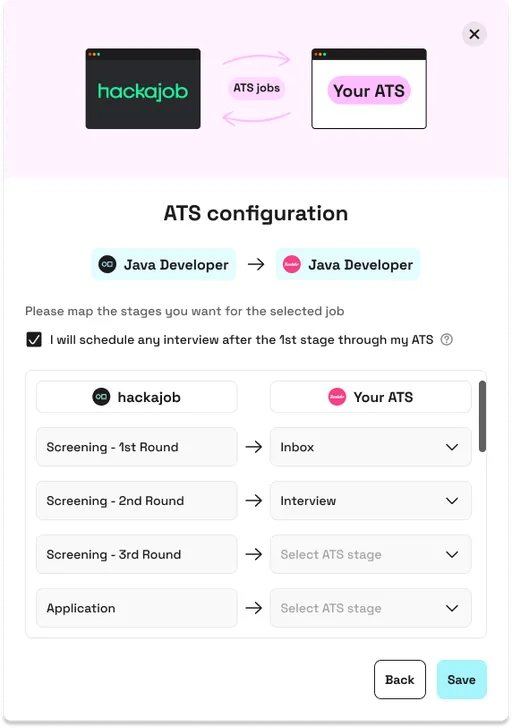
Click Save.
✅ When candidates accept your request they’ll be exported into your ATS
Tips
Edit or remove mappings anytime from the ⋮ menu next to a job.
When publishing a new job, you’ll be prompted to add an ATS configuration — always complete this step.
✨Pro tip: Once you’ve mapped a role once, clone that setup for new jobs. You’ll never have to redo stage mapping from scratch.
4. Support
If you run into any issues:
Check permissions (hackajob Master Account + Ashby admin permissions).
Review the connection guide
💁 Contact your Customer Success Manager for further assistance.